Showing posts with label AFV. Show all posts

Tuesday, January 31, 2012

Panzers in the snow

After presenting the one-man-army yesterday, it's time for some armour!
Enjoy my primed Panzers:


Somehow I'm getting to like how you foreigners misspell the plural of Panzer :)
What do you think, when you hear the word "Panzer"? What do you associate with it?
Tanks in general? German tanks? Some specific kind? I'm curious about that! Go ahead and tell me!

Hi Steve(http://soundofficerscall.blogspot.com/) and Melvin(no blog!?!)! Welcome on board!

//mojo

Thursday, December 15, 2011

Sd. Kfz. 222

To say it with Fran's words: The painting-bug has bitten again :)
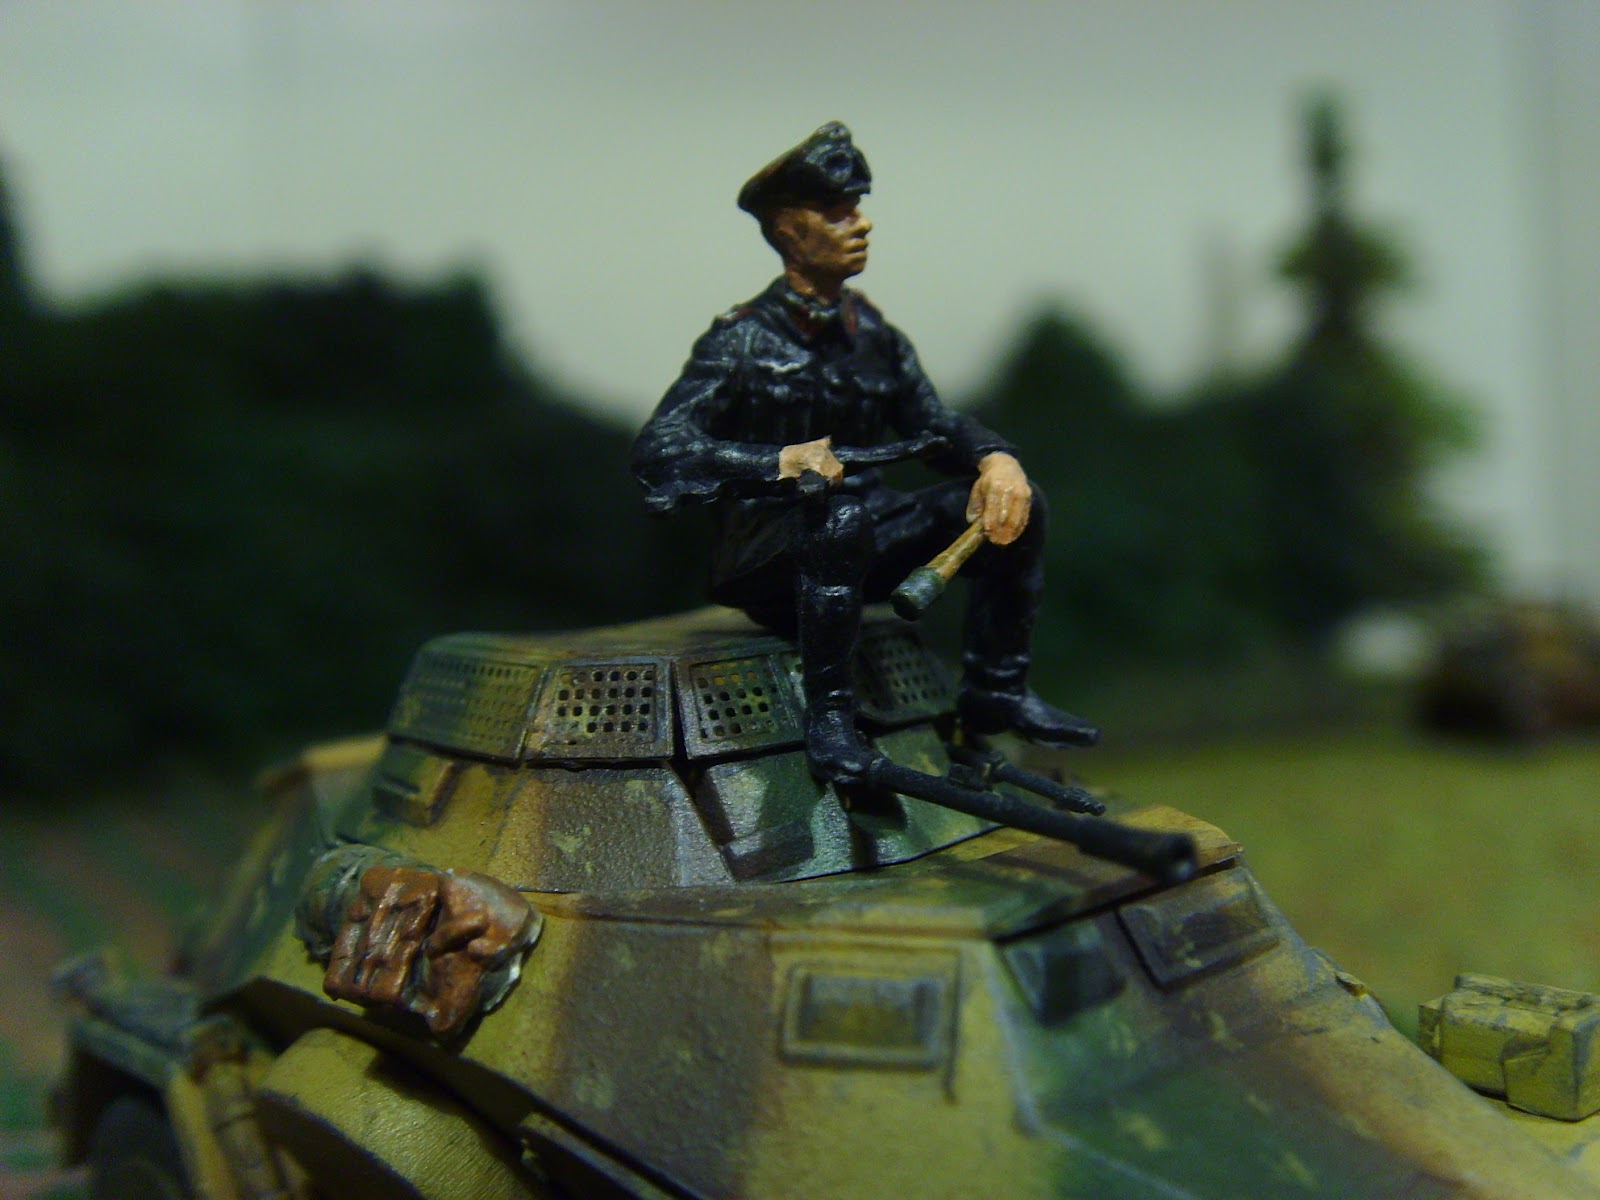
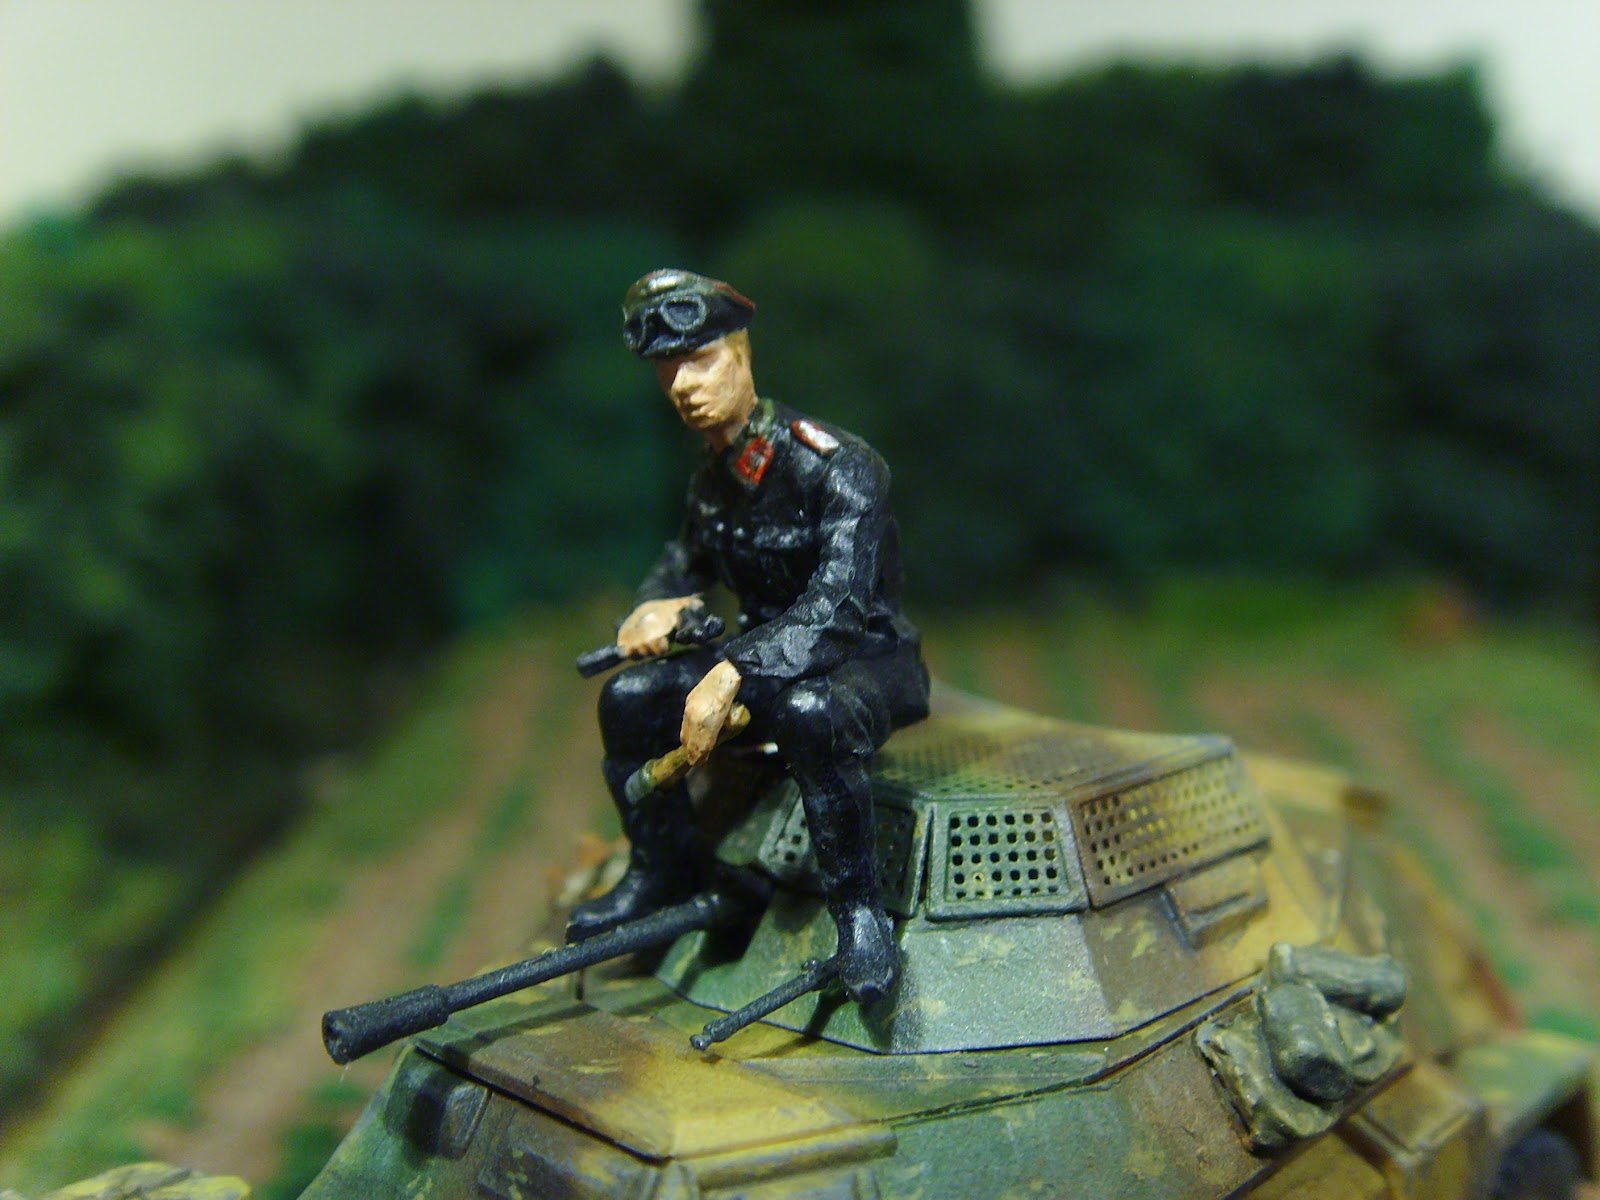
This time, his theeth hit cold steel - one of my favorite WWII vehicles, the Sd. Kfz. 222:


Friedrich has had a long ride. Time to sit back.


Being ever-vigilant Friedrich has his Schmeisser MP and a potato-masher at the ready...


The Sd. Kfz. 222 Kit was made by ICM. Overall it was a nice and easy build, with amost no flash and good fitting. It features a small photo-etched fret for the the rear top (under the turret) and the anti-grenade mesh on the turret. This mesh is the only real downside I found on this kit, because its a wee bit to wide (this is why I pushed it down that far).

The vehicle accesoires were crafted by SHQ. I especially like the bucket. I could not help but fix it right to the front of the car...

The two Jerry-Cans were from Herpa-Minitanks, the former Rocco Minitanks. They're 1/87, but they fit pretty good.

Friedrich's last name is "Preiser". He is a part of Preisers "Aufgesessene Panzergrenadiere". Dispite the fact of wearing the wrong tunic for a tank-man, I like him pretty muh on that vehicle. Sitting around and wait for something to happen seems to be a proper job for a scout ;)

I hope you like this one!

One last question:
Was the last post with pictures from the original Siegfried-Line really that uninteresting?

Cheers,
Mojo


Thursday, October 20, 2011

Tutorial: Tarps for Sd. Kfz. 251


Hey guys! Sorry, it's been a while and I wish I had time to put this up a few days earlier... But you know... Yeah you do, so let's get started ;)

As promised, this is about how to make tarps for Armourfasts Sd. Kfz. 251. Of course you can use this method for anything else, maybe some wild-west-cart or whatever you can imagine :)

First, I decided to make a base for my works, because I didn't want to handle the freshly painted hanomag all the time.
I measured the outer edges of the open cabine and made polystyrene sheet with exactly those measurements, so it can just be put on top. It's roughly 35mm x 20mm, but please measure for yourself.


Next step: Drilling holes for the bails. I tried to find some images of hanomags with tarps, but they are rather hard to find. In the end, I drilled by sense of proportion ;)
You need to drill as close to the outer edge as possible. Also, you should drill a little skewed, so that the bent bails fit perfectly. I won't go into depth here, just look at the picture above, where I tried to mark the skewness with blue arrows.
Please keep in mind that the bail at the back is tilted a bit forward! 

For the position of the holes, I used (measured from the back) 0,7mm; 13mm; 25mm. This might be inaccurate because the foremost bail sits far further in reality. You can do this as you wish, but it proved perfect if you want to place a figure at the front of the open top or want to leave the machinegun uncovered.

I used a 0,8mm drill because I had copperwire in the same strength.
Now cut some copper wires to 24/25mm long pieces and bend them to a shallow slope. They should just slip into the drilled holes. Fix them with CA. As always when you work with CA, you should wear gloves.


Right now, you should place the whole thing on top of your hanomag and decide what you want to do with the front part of the tarp. As I mounted my machine gun with the butt hanging down, I had to carve some part of the base, so that the tarp can hang down into the compartment and the Machinegun as whole can stay visible.
If you plan to place a figure, you have to carve out a lot more. In fact I left about 3mm after the foremost bail.


 You can put the gloves on again , as we will continue working with CA (as you can see, I forgot it and instantly sticked to my project :-D ). Take a piece of tissue, roughly 35mm wide and 45mm long. Put a drop of CA on the very top of each bail-wire and press the tissue on it. 
As soon as its dry, you can start to put CA on the left half of the bails (from top to bottom). Do all three bails at once. If you are fast enough, you can also put CA on the edge of the left side of the base. 
Now pull the tissue against the CA. Be careful not to tear it appart!
If you are done with it, do the same on the right side.

If you are done, you should have a nice tunnel of tissue :)
Now fix the tissue to the back edge and to the (carved) front edge.
Just to be sure, I went around the edge and added another layer of CA.

When its dry, use a sharp knife and cut off the overhanging tissue. It should look like this:


Pretty nice, eh? Don't crow to soon. It'll look ugly in a minute. 
To add some stability, we need to cover it all up with some heavily thinned white-glue. Apply 3-4 coats of it with a soft brush, letting every coat dry for about half an hour at least. My tissue began to slobber when it got wet and in the end it looked like sh-t. I almost threw it away and filed it as another trial-and-error-error. But that would have been wrong. The solution is simple:
Take another part of tissue (again 35mm x 45mm), wrap it tightly around the tarp and start soaking it with thinned white-glue. While it dries, apply a fair tension to the tissue. This time it will not slobber. Again, 3-4 coates of White-Glue strengthen the whole thing, when you're done, cut off the remains.

Now you can paint it as you wish. Hopefully the result looks roughly like this:


After applying a coat of gloss varnish, add some ink/wash to emphasize the folds (yet to be done on my hanomags).

I hope this helps and inspires you guys :)
If you do something similar, blog it please :) I'd like to see your results!

Cheers, Mojo

Saturday, October 8, 2011

Hanomags with tarps, PSC Panzer IV and other stuff

Hey Guys,
after I was on an involuntary trip to the hospital this week, I'm back and feeling fine again.
Before I went away, I got some stuff done. The vehicles from last post are now ready for
decals and weathering:

The ICM Sd. Kfz. 222
The Hasegawa Sd. Kfz. 7/1 with brass gun barrels

The PSC Pz. Kw. IV
Same
I thought "Dude, these Panzers are sooo cheap, you really need to do experiments on those Schürzen!"
That's the first result of trying to "personalize" these cute little buggers. I think I can really recommend these models to all wargamers with a good conscience. They are pretty easy to build, they look really neat, and they come cheap and in masses ;)


Ok, you remember those? Armourfast Sd. Kfz. 251/1. Maybe this kit is the best that armourfast ever released, still I am not very pleased with it. I worked a lot on those, beginning with milling out all the plastic between the roadwheels, throwing away those fucked up (excuse me...) benches and so on. Especially the interior is so bloody undetailed, I still could instantly throw up. How can one sell an open-top vehicle without any mentionable details??
There were 2 options: Make the details by yourself (Hahaha! Never ever.) or cover this empty mess up.
Said. Done.
Number one:
Yay, a convertible ;)
Same
Number 2:
Commander on parade
Same
Some time ago, I bought this neat little "Preiser Motorisierte Infanterie"-Kit (See here) but due to the lacking interior-detail I refrained to waste all those guys on these Hanomags. On the other hand, I could not wait to see, how these figures turn out, because they look soooo good on the sprue, so I managed to fit the tarp in a way that the commander can provide some overview.

All the models are still pretty bright, but that will drastically change during weathering. I hope you like the tarps! If anybody is interested in how I did those, leave a comment and I'll put up a tutorial these days.

Have a nice weekend!

Monday, September 26, 2011

On the desk...

Since Blutvogt, Mork and Wiking already posted lots of pictures from the Inspiration Modellbau, I decided not to post anymore... Hope that's ok ;)

Instead I'd like to show, what's currently on my desk:
Let's start off with the least finished:
Armourfast German Machine Gun Team #1. The guy on the right needs an ammo-belt prior to painting.

Armourfast German Machine Gun Team #2. One soldier brings new ammo, the other feeds the gun.
I had to slightly adjust his right arm, so that his pose makes any sense at all ;)

Ok, next:

Two Armourfast Sd.Kfz.251/1. Unfortunately, these are the early war variants. I'm waiting for PSCs Ausf. D :)


Zvezda Flak 38. A real beauty. I dislike the plastic a bit, but the details are just great!
Hasegawa "8 ton Half Track Quadruple 20mm AA. Also known as Sd. Kfz. 7/1 
This kit has quite some flash. I would rate somewhere between average and pain in the ass...

 Since the original Hasegawa gun barrels with 1mm thickness were a real no-go, I bought some ABER barrels in Mainz at the IM. They look far better :)

Were getting closer to the end:

This is the ICM Sd.Kfz. 222
I really like this one, it was a pleasure to build. Good that the added the option of the late-style wheels :)
The only downside: The etched bass on the turret-top is a little too wide.

Ok, now the last project. Most recently added and most advanced:
Plastic Soldier Company Panzer IV. Great Model for wargamers. I opened the muzzle-break, and will add the Schürzen of course. Since these neat little bastards come quite cheap, I'm going to experiment with broken and misplaced Schürzen :)

Hope you like them...
Cheers,
Mojo