Showing posts with label Tabletop. Show all posts

Thursday, June 9, 2011

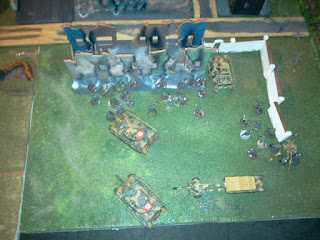
Behind Omaha Game

Just a quick, last post before my 2 weeks Holidays in Croatia :)
We had a game last week, fictional setup: British and Russian forces against Germans...
I am sorry for the crappy quality of the pictures. Our room is much to dark :(
Here's my Setup:
Eds Russian Setup
British Setup
The whole table:
Forming behind the farm
Placing the Paks and advancing with my Grunts
A Chaffee goes way too far...
The SU at the left end of the table held me up almost all the game.
British advance on the right flank
Late Game: The Chaffee and a Jeep were lit up some time ago. 
Finally I was able to knock that KV-1 beast out. Revenge for my pittyful Panther (who never ever scored in a single game! arrrrr....)
Fighting off the British Tanks and Troop carriers
Late-game overview
Some random pics...


At 3 A.M. I gave up, after my infantry had been utterly crushed by russian mortars and machine guns.
It was a very hard fight, lacking a bit dynamics for my taste ;-)

Enjoy yourselves while I'm away. I hope I don't miss too much of your great Stuff!

Ah, welcome m0e, a Behind Omaha beginner!
His Blog is yet in german, but hey, give him a chance and stop by :)


Tuesday, June 7, 2011

Farm-Raid

On the sixth of June, in the early hours of the evening, german troops raid a farm in normandy. This Kampfgruppe belongs to the Panzerlehr-Division which is advancing westwards to patch the holes in the costal front.
On the way they try to clear the upstate from scattered Airborne troops.
 To be honest: I'd only like to show of my new selfmade pieces of terrain:
 A field growing vegetables

 An already mowed crop field
 Hans is getting ready to throw the stick for the farms dog
 The Master for the Building was made out of foam board
 The windows were scratched from polystyrene
 The Windowlatches and doors were made of balsa wood

  The roof is made of corrugated cardboard

 Now, this building was completely cast from ceramic
 Next to the already known barn, I added a NWC, non-water-closett :-)

I hope you like it!
Finally, welcome to fpotd, he runs a blog featuring a funny pic each and every day! Go check it out! :)

And also welcome Trull, I am really impressed of his house-building skills!

Cheers, Mojo

Monday, May 30, 2011

Successful weekend

Hey guys! I'd like to share some more pictures of a very successful modelling weekend.
As mentioned before, I was busy doing moulds and casts.
First of all, I'd like to present the first cast from my roof-mould. It's about 3mm thick and made of Stewalin, some ceramic-like plaster:


It came out perfectly. I could not find a single bubble, and it's rather stable. Somebody said it's going to break while unmoulding because of lacking thickness. It didn't, har, har, har!

Next thing I did was fitting the windows and doors inside my Normandy-Farmhouse masters and applying the windowshutters in order to make the mould. This is how the moulds turned out:

You might notice that its already "dirty" from a first cast... Again the cast turned out pretty well, with a minimum amout of bubbles. Seems like I learn how it works :) But I won't show the farmhouse until its done.
Won't take long anymore ;)

Have a nice week!
Cheers,
Mojo

Wednesday, May 25, 2011

5000 hits + 30 followers + some progress after all!

Today WIMP has a double-anniversary!
You guys scored 5000 hits! Its not much, compared to YOUR blogs, but it makes me happy!
AND: There are 30 guys of you following my blog!
Thanks for both!! Cheers!


I can finally show some progress on my gametable-equipment project:
I am a bit behind the schedule (I wanted to finish it last week), but it's getting closer to the end:


One night I was unable to access my equipment because SWMBO already slept (Bedroom is my hobbyroom ;) ), so I did a quick and dirty built from some waste-pieces of foam:

Unfortunately the PVA didn't cover the surface pretty good as I wanted to add texture, so I dismantled it and will try something else. As you can see, the roof is still missing. No problem, here comes the solution:

This is the mould of my very own roof! As you can see, It's approx. 20x12 cm so I can get rooftops for a complete house out of one single cast! I managed to do the mould-cast WITHOUT ANY BUBBLES!!! 
Yeeehaw!


Now I want to welcome two new followers (that completed my set of 30)!
and
Hehe, I guess thats one funny coincidence :-D
Check out there blogs, there's much to see in both cases, hehe... Trust me ;-)

Finally the comments on the last post:
@Blutvogt: Try it, if you have the spare ca$h, it's really not that hard
@BigMike: I think I will have to do lots of castings from the Mould. There are quite some empty doors and windows to fill ;)

Now it's time to go to work! Have a nice day!
//mojo

Wednesday, May 18, 2011

Cast done

Last night, I have had my first contact ever with resin in liquid state ;)
I finally did the casts of the peripherals for the Houses.
I am amazed about the level of detail. Almost every little bit of the balsa wood pattern is visible!
Even one of the failed doors (right) looks pretty well! I am impressed.
And it's so much easier to work with, compared to plaster... I guess, I like resin.

Here's a quick shot...


Cheers, Mojo

Tuesday, May 17, 2011

Mould made

Yesterday I made the Mould for the small parts of the Houses. Though most of the results look crispy and clean, the mould has eaten most of my balsa masters. I should be able to use them as some kind of rubble.
Two of three doors were an absolute fail, but its not that bad. I dont need as manyof them ;-)


Last but not least I wish to welcome Alan to my Blog :)
You can find his own blog here! He has produced some beautiful timberframed houses on his own recently! Go check it out! :)

Cheers,
Mojo

Monday, May 16, 2011

Restaurant "Au Boef"

A few weeks ago I headed to Haguenau, Alsace, France with my girlfriend. On the way we passed some history-charged villages like Hatten and Rittershofen (Operation Nordwind, Jan. 1945), but we didn't stop there.
Also, a bigger village called Soufflenheim crossed our way. Soufflenheim is well-known for its traditional pottery-arts. More than a decade ago, my parents took me there, looking for some pottery-bread-pot, and we had a lunch at the local restaurant "Au Boef". This is where I tasted frog legs for the first (and last) time. It hasn't been the bad cook, no. It's just not my thing :)

However, when we were driving through Soufflenheim, I instantly recognized this restaurant. Last friday, while taking a sunbath in the local park, I was planning my gamingtable. I decided to put some outskirts of a small village on it. So a café/bar/restaurant may not be missing. This is where "Au Boef" comes in :)

I started to reconstruct it from the photo that I have taken on our tour:

I will not build the whole thing, just the first half of the house.  So here is the first shot of my planning and construction:
Its a bunch of work, but I am sure it will pay off. I started to mark where the windows should be placed, and where the timberframes are. Then I cut balsa-wood into matching pieces and glued them on top.
This is how far I got until now:
I really hope you like it :) The space between the frames will be covered with PVA and very fine sand, to create a rendered surface.

Now a few words to my foregoing post, which I published on a most unfortunate time, between Bloggers two downtimes. I asked for some help with motivation, and The Angry Lurker as well as Paul were kindly trying to motivate me. These comments have vanished in the depth of googles Blogger-Databases, but are unforgotten :) Thank you, both! I didn't start off making moulds yet, but will do this week! :)

I hope you guys (and gals) have a good start into your new week!

Cheers, Mojo

Friday, March 25, 2011

20mm Barn

Tonight, I finally finished the first part for the all-mine-gaming-table: A Hay stack:


I'show you what I've done:
Fist: A plan. As always :) Two fronts with a gate on each one are not really useful. I corrected that later ;)
As you can see, I recalculated the models measurements in real measurements (using scale 1:72).
I got me some coffee-mix-sticks at the local 0€ shop ;). These were used as planks. I carved the edges to create a rugged look:
Afterwards, they were glued to the cut-out shape:
Using my all-time-favorite tool, the proxxon scrollsaw, i cut off the excess wood:
Here's the finished sidewall:
This also happend to the other sidewall, the front and the back.

Now I went for the wood-shingled roof. I sanded some really thin polystyrene sheet (0.25mm) and cut it to ~7mm strips, which themselves were gashed with scissors:
I needed quite a lot of these... They are glued overlapping onto the cardboard. Of course you must start from below... This is really a lot of annoying work, if you add some fissures to the ends of the shingles and make them of odd length...

Next up: The gate and the top-window. Again, we need some strips of the sanded polystyrene. This time some more narrow ones (1-2mm):
They are being glued to the thicker, supporting polystyrene back, which already has the final shape of the gate:
Small hint: use only two narrow stripes of glue, right angled to the planks. This will (hopefully) prevent the glue from coming out between the planks. You can see that little desaster above. With the described technique, all went well :)

Again, cut off the excess "wood", but don't be to accurate:

If you are kind of a perfectionist, as I sometimes (only!) turn out to be, you might carve the ends of the plank with your scalpell. Use two different angles to get a nice finish:

Then it looks like this:


Finally, glue some supports to the gate. I had the nice idea of using them as door hinges.
Therefore I bent the strip around the outer side of the door and fixed it.

As this was the work of several days, I decided to make some molds of it. One can always use hay stacks ;)
These are the (goddamn expensive) silicone molds and the first casts:


I hope you like it!

Cheers, Mojo