sorry for keeping you waiting. I needed a little timeout desperately yesterday. So here's how it works.
What you DO NOT need:
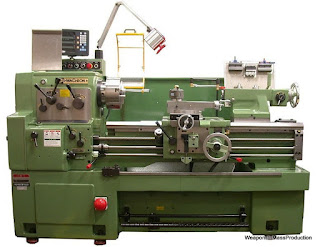
A lathe. I am pretty sure you have all (or at least most) of what you need around...
First, some information about what you are going to recreate. I found mine here:
http://www.network54.com/Forum/47207/message/1276298562/Ammo.
Sure, it's about the Stu. K. 40, but it will do for me.
Here come the tools and stuff:
- Some kind of multitool. I use a Dremel
- A caliper
- Some small and fine files
- Some very fine sanding sheet
- 2mm round steel rod
- a saw
- and a sketch with scaled measurements, made from your information source...
Lets start off! Saw some 3cm from your rod.
Insert it into the chuck of your multitool and choose a file with a sharp edge.
We start with the skew near the front end of the empty shell.
Turn the multitool on and press the file on the turning rod about 2mm away from the end.
You should have something like this after a very short time:
Now we will slim down the front part to 1mm (roughly 75mm in 1/72).
Hold your file flat and pay attention not to "harm" the skew side!
When you got it down to 1mm, measure how long the frontal section may be.
In my case, its about 0.7mm. Use a sharp edged file to "cut" it off:
You can really make clean cuts with this method.
This is what it looks like, shortly before it's cut:
Maybe you have use of shapes like that in some other project.
Next: Measure the overall length of the shell. In my case thats about 7mm.
Mark it on the rod.
Make a shallow cut right at the 7mm spot.
Now use your flat file again and try to position it like shown below.
A very thin rim should remain!
Begin to turn the shell thinner until you reach 1,5mm.
While doing that move the file back and forth to obtain a level thickness.
Do not press too hard when you come closer to 1,5mm!
When you have hit the mark, take the sanding sheet and polish your shell.
If you're really keen, you try to drill the shell with a 0.9mm drill.
Let the multitool do the work while you just press the drill against the shell, using a drill handle.
Looks like that:
When you're done, you can cut the shell off the rod and continue on the next level:
Do a shell with a grenade :)
It took a bit longer to do the two new shells (left and middle), but it was quite worth the effort.
I did not cut the rod off completely because I need a base for making a mould.
And here's a little Mock-Up to show the size in comparizon with a 20mm figure:
I hope you enjoyed this tutorial!
Warm welcomes go out to:
Nick Grant (http://20mmgamer.blogspot.com/)
Marcin Nowogródzki(
http://mnowogro.blogspot.com/ )
Winttrix(http://ulltramodernwar.blogspot.com/)
You guys filled the 75 followers :) Thanks!
Another round value: This is my 80th post :)
Another round value: This is my 80th post :)
And a "thank you!" goes out to the blogspot-folks at google who finally replaced the "New Post" link in the blogspot headline with a "Dashboard" link! That doesn't really save much time, but still makes life a bit easier here :)
Good night!
//mojo


Hi, good idea and good job. thank you for sharig..
ReplyDeleteerhan
miniafv.blogspot.com
No problem ;) Try it out!
DeleteWow!
ReplyDeleteGlad you like it!
DeleteYou are the man!! Thanks for sharing.
ReplyDeleteHehe, thank you, GReg ;)
DeleteExcellent... you did a great job explaining this... overall quite useful tips and great work all across the blog.
ReplyDeleteThanks for sign-up in our blog (http://miniaturas.sin-dominio.com/en) i linked up yours from our link page !
Cheers !
Thanks for the flowers :)
DeleteVery good..you should make a mold..(it would be easy considering the shape) and cast them in resin...you could sell them
ReplyDeleteCheers
paul
Thanks Paul! The mold is ready to be filled. Hope to manage this tonight...
DeleteI'll need some fresh syringes for this... Pharmacy, I'm coming!
But to sell them, I would have to do vacucasting for such small pieces.
Everything else would take to long and produce too much crap ;)
It's amazing how much work wargamers spend on such tiny details :)
ReplyDeleteAmazing work, dedicated work as well....
ReplyDeleteYou are crazy, Mojo! But it is great, indeed!
ReplyDeleteWhere is the "I like" button when needed ;-)
By the way....Happy Birthday Mojo! Best whishes and have a nice day!
ReplyDeleteThanks, Pal! Very kind of you ;)
DeleteBoy, oh boy... Really great work !
ReplyDeleteBut you're completely insane, aren't you?
When will you start taking orders? ;-)
And most important:
Happy Birthday lad !
Insane? Who? Me?
DeleteI'm just like any other wargamer/modelmaker!
Others have 23 completely painted armies of whatever therefore!
Ok, that's insane, too. You got me.
Before starting to take orders, I'd have to create lots of moulds and get fresh resin, as mine turned out to be "aged to crap" yesterday. All I got out of the moulds was either bloated or crumby... arrrrrr.
btw: Thank you :)
DeleteYou are good at this Mojo. That's an insane amount of work there, but well worth it.
ReplyDeleteThanks, Anne! ;)
Delete