
First: Excuse me for not yet posting the video of the casting aid. I was seriously too lazy for that...
Today, I'd like to cover a different topic. Few weeks ago I stumbled over the Website of Fortress Models (click!) and instantly fell in love with their trench system.
I wanted something like that for quite a long time, but never got to build one from scratch.
Well then, fifteen pounds for the whole set is not that much and the shipping fee to germany was also very fair (3.60 pounds).
Here's what I got:
 | |
| 1 observation post |
 |
| 2 corner sections |
 |
| 1 gun pit |
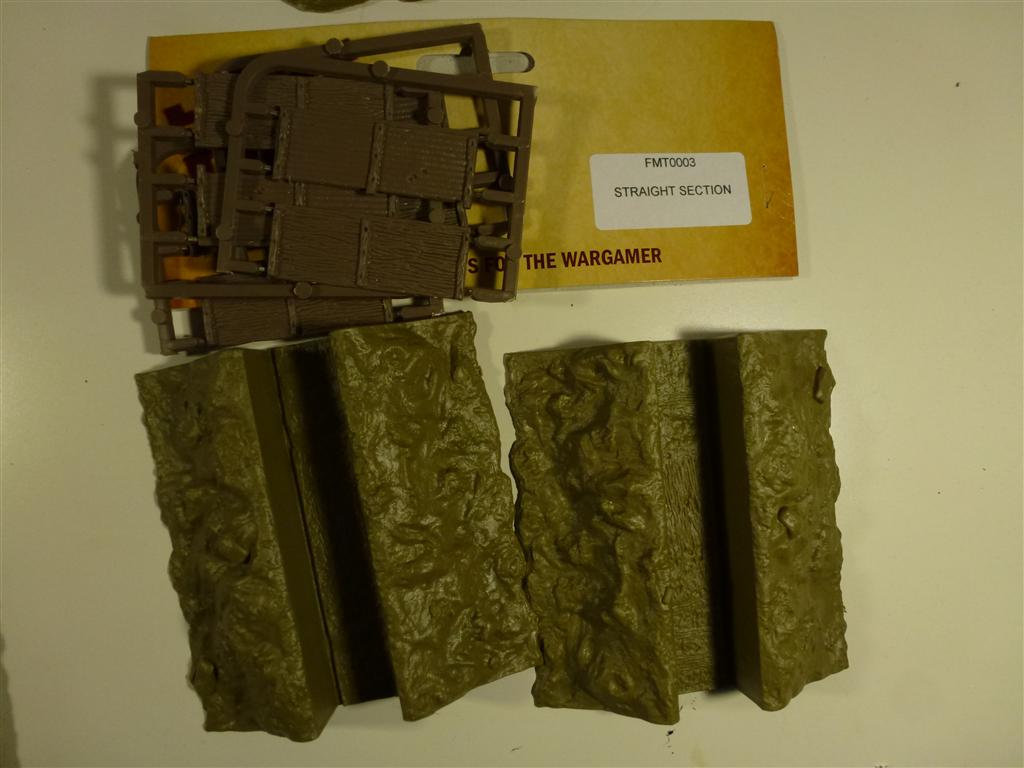 |
| 2 straight sections. |
At the bottom, the sections are 19mm wide, if the reinforcements are not in place and 15 mm with installed reinforcements. This means, that if you based your figures on European 2-Cent coins(quite common here), they won't fit into the trench. If you used 1-Cent coins, you're just fine:

I've asked that before I ordered, so I knew there would be some work coming with this shipment (which was pretty fast by the way!). Like most modelmakers I know how to help myself in such a case:

I've cut all the sections in the middle and extended the gangway with polystyrene sheet which was covered with Wood putty afterwards. The parts themself stay seperate since extending the gangway for a shared base would have meant more work. In addition, I can put the double length on the table if I need to...
The floor of the gun pit was a bit bent, so I replaced it with PS Sheet and added floor cover with wood putty.

Here are all parts after priming:

The gun Pit after the first layer of paint

And again from behind. The sandsacks are really nice!

Here we have some (half) sections after the first drybrush:

Now to the reinforcements...
There's some corrugated iron parts. I painted them in silver and washed them with rust color.

I did put some more work in the wooden reinforcement. I painted the planks in different shades (base color: Vallejo old wood, mixed with various other tones), to simulate wood from different sources.

I prepared some Oil Color on absorbing cardboard. This partially sucks out the oil, leaving the pigments. In the result, the drying time is reduced significantly and it cures more flat.

Regard the oil stain on the cardboard! That's how it must look before you start painting all those wood-parts.

As soon as you finished one part, wipe the oil-colour off again. What remains darkens and homogenises the wood, making it look more natural (upper freshly painted, lower wiped).

Here's a slightly better view on the result:

I'll post the finished Trenches tomorrow, stay tuned!
Mojo
Damn fine work Mojo. Looking forward to the next installment.
ReplyDeleteHi Mojo,
ReplyDeletethat looks really goor. I'll keep fortress models in mind!
Cheers
Monty
Some very nifty work you're doing on these...
ReplyDeleteCheers, Dave
Mojo: You got yourself a really nice item. Wonderful start on the project and notes to the interested...like myself.
ReplyDeleteYour cutting of the trench along the duckboards is a brilliant idea to add the needed width. Well done!
ReplyDeleteLooks like a useful piece of kit, reasonable price too. Good tip on the oil paints as well.
ReplyDeleteAlan
Thanks pals, here comes the finished product!
ReplyDelete