I'show you what I've done:
Fist: A plan. As always :) Two fronts with a gate on each one are not really useful. I corrected that later ;)
As you can see, I recalculated the models measurements in real measurements (using scale 1:72).
I got me some coffee-mix-sticks at the local 0€ shop ;). These were used as planks. I carved the edges to create a rugged look:
Afterwards, they were glued to the cut-out shape:
Using my all-time-favorite tool, the proxxon scrollsaw, i cut off the excess wood:
Here's the finished sidewall:
This also happend to the other sidewall, the front and the back.
Now I went for the wood-shingled roof. I sanded some really thin polystyrene sheet (0.25mm) and cut it to ~7mm strips, which themselves were gashed with scissors:
I needed quite a lot of these... They are glued overlapping onto the cardboard. Of course you must start from below... This is really a lot of annoying work, if you add some fissures to the ends of the shingles and make them of odd length...
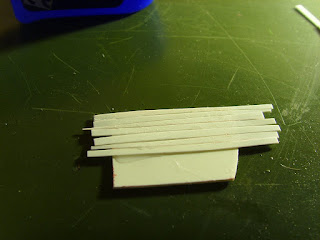
Next up: The gate and the top-window. Again, we need some strips of the sanded polystyrene. This time some more narrow ones (1-2mm):
They are being glued to the thicker, supporting polystyrene back, which already has the final shape of the gate:
Small hint: use only two narrow stripes of glue, right angled to the planks. This will (hopefully) prevent the glue from coming out between the planks. You can see that little desaster above. With the described technique, all went well :)
Again, cut off the excess "wood", but don't be to accurate:
If you are kind of a perfectionist, as I sometimes (only!) turn out to be, you might carve the ends of the plank with your scalpell. Use two different angles to get a nice finish:
Then it looks like this:

Finally, glue some supports to the gate. I had the nice idea of using them as door hinges.
Therefore I bent the strip around the outer side of the door and fixed it.
As this was the work of several days, I decided to make some molds of it. One can always use hay stacks ;)
These are the (goddamn expensive) silicone molds and the first casts:
I hope you like it!
Cheers, Mojo


Very nicely done. Thanks for the tutorial.
ReplyDeleteIt's very nice, but it's a barn not a haystack. A haystack is simply a stack of hay; there is no building involved.
ReplyDeleteNice, Mojo. Would you like to have my adress? Then you will know where to deliver...;-)
ReplyDeleteHi IM, welcome to my blog! You are right, I'll have to change the Topic of this Post and produce a Haystack at a later time ;)
ReplyDelete@Dan: Thank you, too ;)
@Mork: Interested? ^^
Greetings, Mojo
That is a great work Mojo!!!!
ReplyDeleteVery inspiring!!
Well done!!
T.